

How To Install A Pioneer Mini Split Ac

Do-It-Yourself Mini Split units have become very popular since they are a skilful alternative to high-cost HVAC installations.
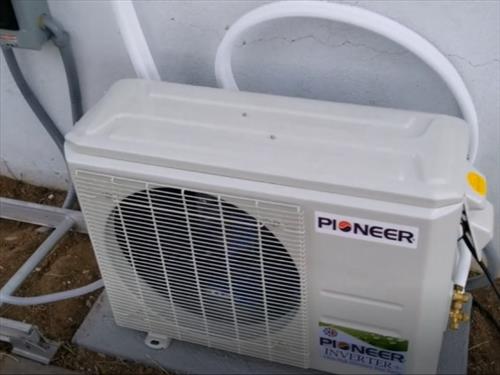
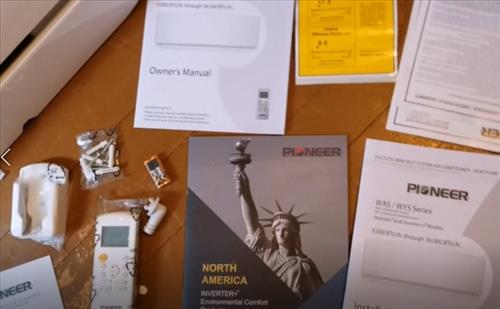
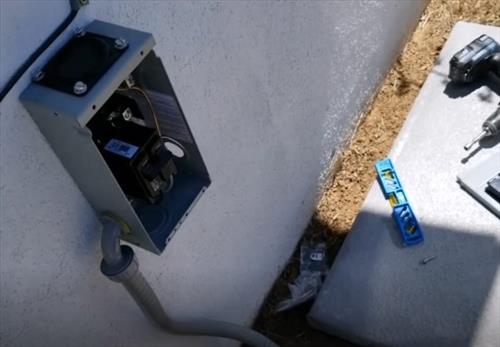
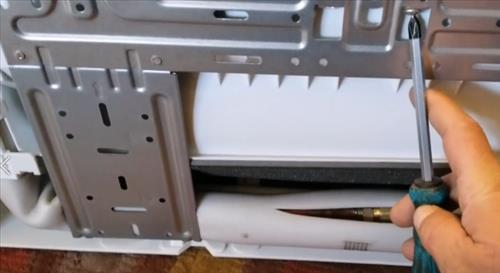
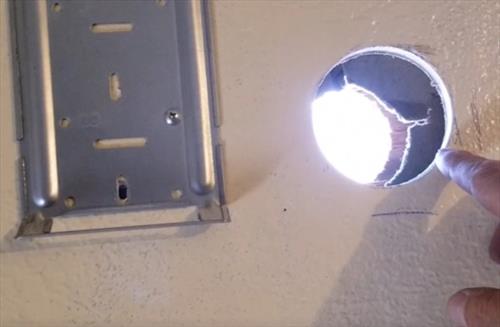
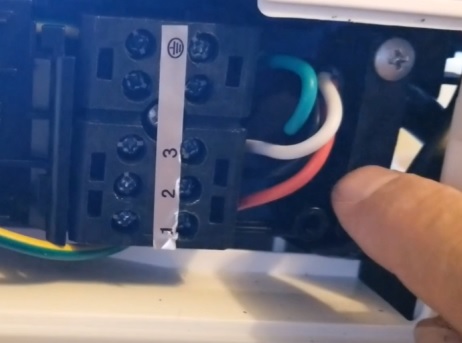
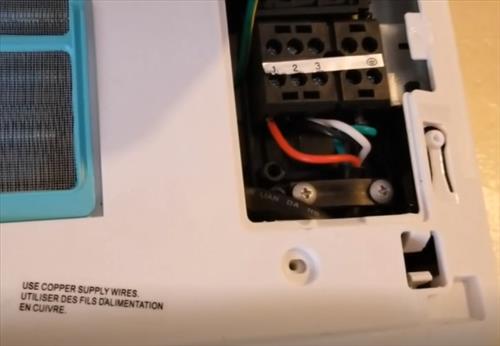
They come with most everything needed except tools and electric wiring to a console. At that place are many units available from pocket-sized 9000 BTU units to large 36000 BTU units. Heat pump units such as Pioneer both rut and cool making them expert to use all twelvemonth long. Pioneer is ane such popular DIY Mini Split up industry with several different sized units. A video is also posted at the bottom of the folio of the install. Here is the unit I bought on Amazon The unit volition come with lots of data such as user manual and installation instructions. In that location are some tools that will be needed such equally a Vacuum Pump and Manifold Gauges. Some other basic tools volition too be needed such as a drill, screwdrivers, and wrenches. About Mini Split systems volition demand a five/xvi″ Female Coupler to ane/iv″ Male Flare to connect the manifold gauges to the unit. Here is i on Amazon A 3-inch pigsty saw scrap is also needed to drill a hole for the line prepare and wiring to become betwixt the units. How To Install Pioneer 12000 BTU 230 Volts Ductless Mini Dissever The unit I received needed to be on a twenty AMP breaker which can be run to an electrical console or on its ain box. Most HVAC companies will install a disconnect box which only breaks the menstruum of electricity when work is needed on the unit. Personally, I install a 20 AMP billow shut to the unit merely this is a personal preference as long as it is on a twenty AMP breaker at the panel. If at that place is no pad one can exist bought or a pocket-size cement pad can be poured. Small pads are low-cost items that tin exist purchased and what I use for instance this one on Amazon. Mini Split up Pad on Amazon Whichever way a pad is set up up be sure it is level and ready the exterior unit of measurement on top of it. There are a few things that need to be done before it can exist mounted. First, the mounting subclass will demand to exist screwed onto the wall and level. The mounting subclass is on the back of the within unit held in identify with a Philips screw. A hole will need to be drilled to run the line-set and wires to the exterior unit. Look at the back of the unit of measurement for were the line-set and wiring stick out for were the hole will need to exist drilled. The instructions will also show the location and size of the hole needed through the wall. I used a 3-inch hole saw to drill an opening for the refrigerant line and wiring to get to the outside unit. The connectors are located under the front panel under a pull out on the right side. One trouble I had was the wire colour codes were non exactly the same as the wiring harness sent to me. This was non much of a problem as the inside and outside units are labeled 1-2-3 and ground. If this happens to y'all simply exist sure the wire colour lucifer within and out. For example, Red would exist connected to the connector labeled 1 inside and outside. Be careful with the copper line set as information technology cannot be kinked or will cake the flow of refrigerant. There is a plastic protector that slides into the hole and protects the wiring and copper lines if needed. This is like shooting fish in a barrel enough, but take your time by rolling out the copper line-gear up and hand tightening the connections before using a wrench. Be certain the connectors labeled ane-2-3 and ground lucifer the within wall unit. The L1 and L2 get the circuit breaker for power. Let the vacuum pump run for 15-xx minutes pulling a vacuum. Later on 15-twenty minutes turn off the vacuum pump and watch the manifold gauges pressure. For example, here it is hooked to the Red Estimate and the pressure is negative with the dial nether the goose egg marking. Allow information technology sit for at least 20-30 minutes or more and be sure it holds a negative pressure. Both the high and low side will need to exist released. This is done past removing the caps and using an Allen key turning them to the left counter-clockwise. Summary Of course, if y'all have never washed any basic construction or electrical wiring be sure to call a professional. If you decide to install a unit yourself be sure to read the instructions two-3 times before starting. Programme the install over a i-2 twenty-four hour period menstruum and take your time. While it tin can exist installed chop-chop it is best to go ho-hum. It took me 3-4 hours to install everything. Every install will be a scrap dissimilar since electrical box locations, walls and other things tin can alter a layout.
I recently installed a Pioneer 12000 BTU 230 Volt unit which I idea I would share how I install a mini-carve up.
Pioneer Air Conditioner WYS024G-19 Wall Mount Ductless Inverter+ Mini Split Rut Pump, 24000 BTU-208/230V

Exist sure to follow the Installation transmission that comes with your unit of measurement.
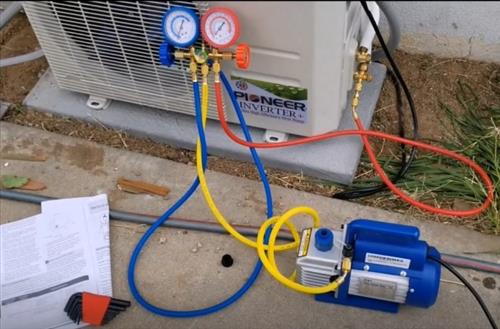
At that place are many low-cost vacuum pumps and gauges which I bought some upkeep ones for the install.
PIONEER Air Conditioner Ductless Mini Split System Charging Vacuum Port Adapter, Converts New R410a Fashion 5/sixteen SAE Service Ports to Accept Older 1/four SAE Gauge Hoses.
Always follow the transmission that comes with your unit for the wire Gauge and breaker Amps. 
If the outside location already has concrete information technology can but exist prepare on it.
Ideal-Air 728184 2 x 16 x 36 Cement Equipment Pad

Be sure to mount the subclass on a practiced stud so the unit of measurement is secure.
Be sure to follow the schematics that come in the manual or on the inside door for your unit.
The wire harness will need to be fed in from the dorsum. 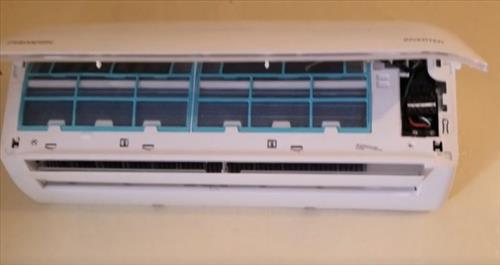
The wires, line set, and drain line all demand to exist fed out the 3-inch pigsty and the unit mounted on the wall bracket.
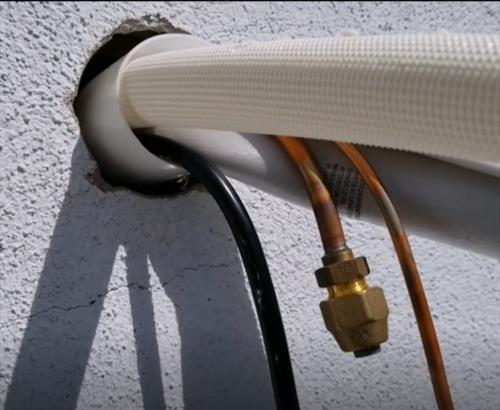
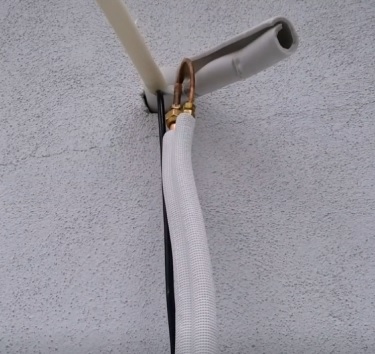
The master matter when installing the line-gear up it to not kink the copper and screw it together carefully every bit to not strip the bolt threads.
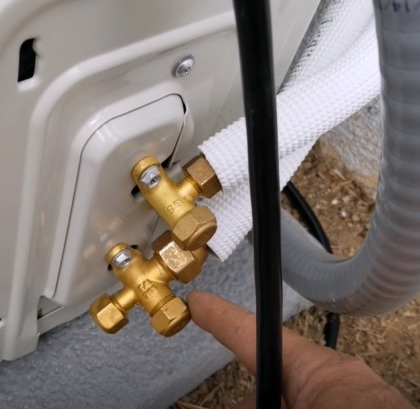
Spiral the basics on past manus advisedly making certain non to strip the threads. One time hand tight use a wrench to tighten them up and get a good seal.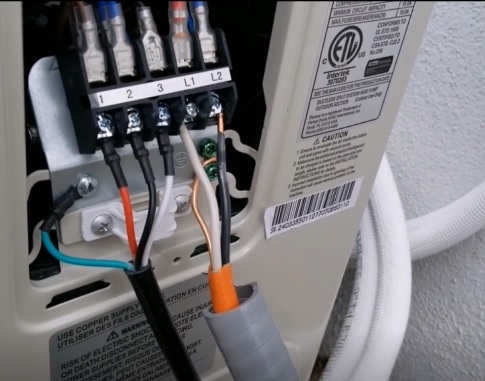
Over again follow the schematic that comes with the unit of measurement.
Using manifold gauges and a pump hook up to the low-side port. Information technology is the only service port on the unit.
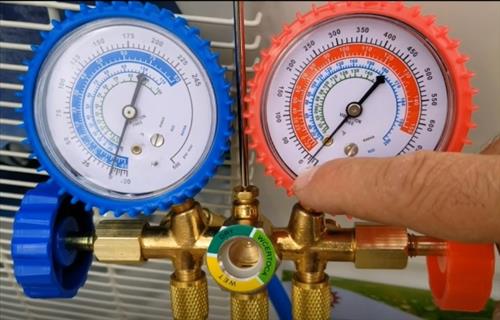
It should concur a negative force per unit area if not there is a leak that needs to be stock-still. 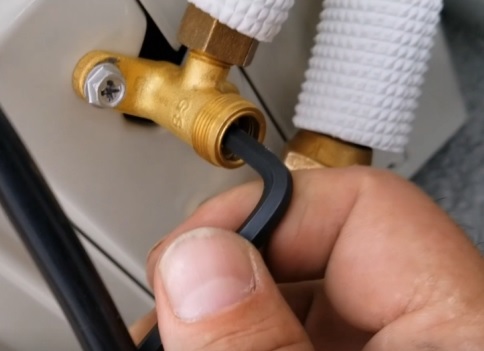
In one case the line-set has been tested for any leaks and has a vacuum the refrigerant can be released.
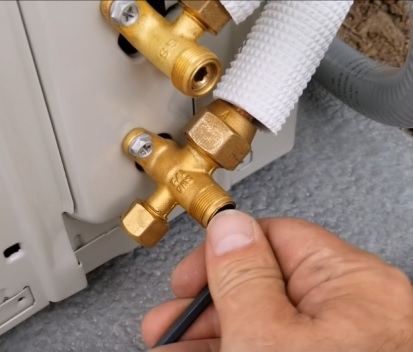
They will need a few turns for the valve to come fully open.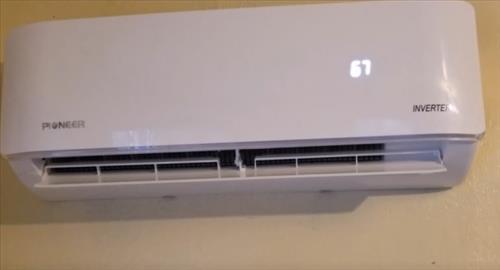
Power on the unit of measurement using the remote control. The right side shows the temperature when the unit of measurement is turned on.
Installing the Pioneer Ductless Mini Carve up was not that difficult and falls into a handy person Do-information technology-yourself category.
Video Instructions

Source: https://www.hvachowto.com/how-to-install-pioneer-12000-btu-230-volts-ductless-mini-split/
Posted by: petitwitterlass.blogspot.com
0 Response to "How To Install A Pioneer Mini Split Ac"
Post a Comment